


In this comprehensive guide, we'll walk you through the process of launching an Elixir node using Spheron. Whether you're a blockchain enthusiast, developer, or organization looking to participate in network validation, this quick deployment method will get you up and running without the hassle of manual configurations.
How do you deploy an Elixir Node using Spheron Compute?
Deploying an Elixir node on Spheron is a simple, streamlined process that does not require any DevOps knowledge!
Step 1: Create a Free Spheron Network Account
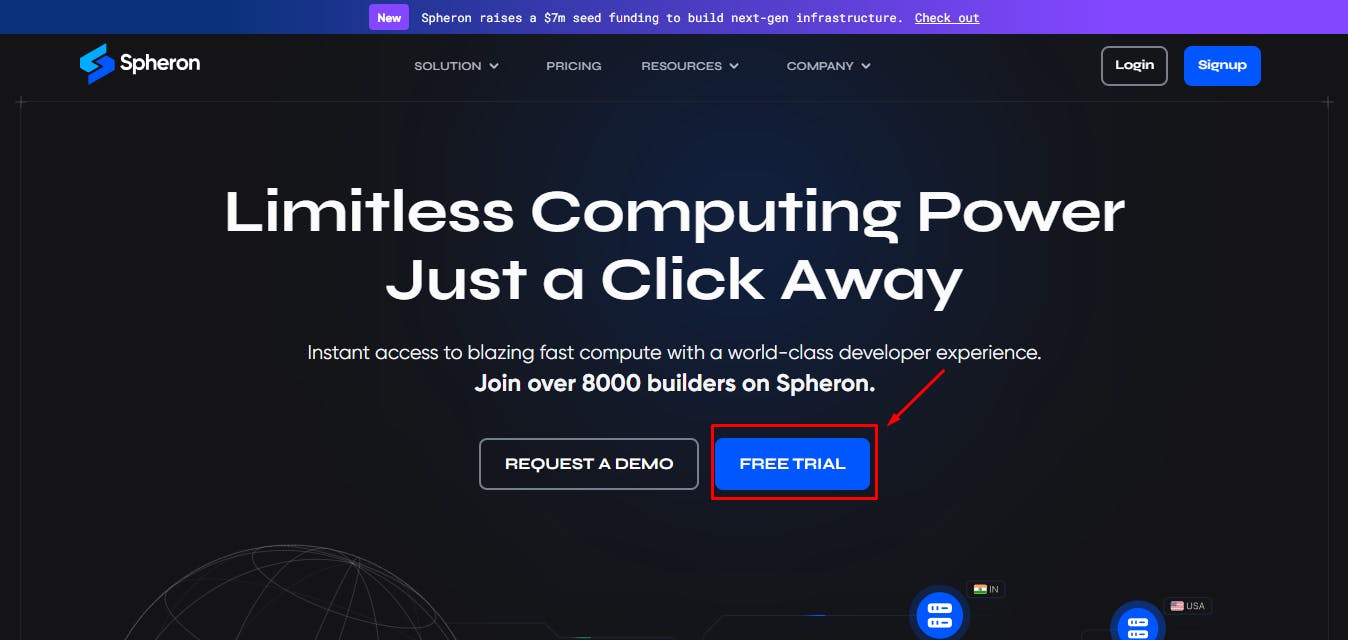
1. Visit Spheron Network: spheron.network
2. On the Spheron homepage, locate and click the "Free Trial" button.
3. You'll be directed to a signup page. Choose your preferred authentication method: Web2 (GitHub account, GitLab account, or Bitbucket account) or Web3 (Ethereum).
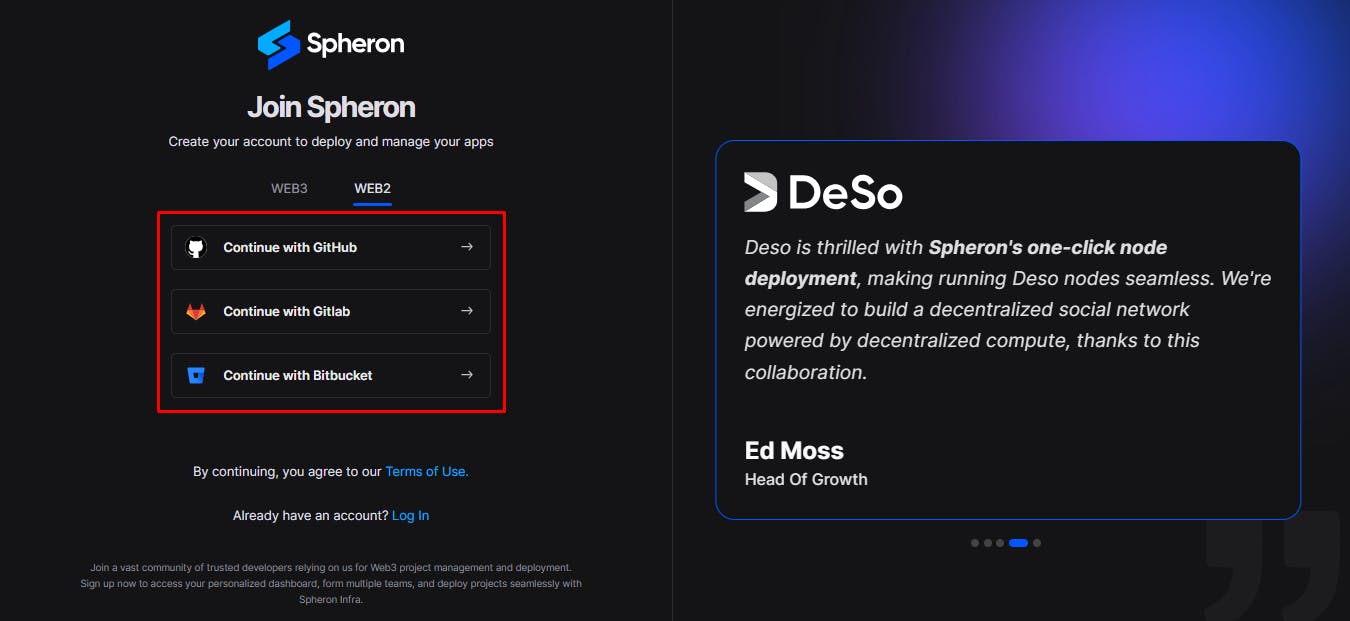
4. Follow the provided prompts to authenticate your chosen account securely. This step ensures safe access to the Spheron Network platform. After successful authentication, you'll be guided to a confirmation page confirming the completion of your account setup.
Step 2: Creating an Organization
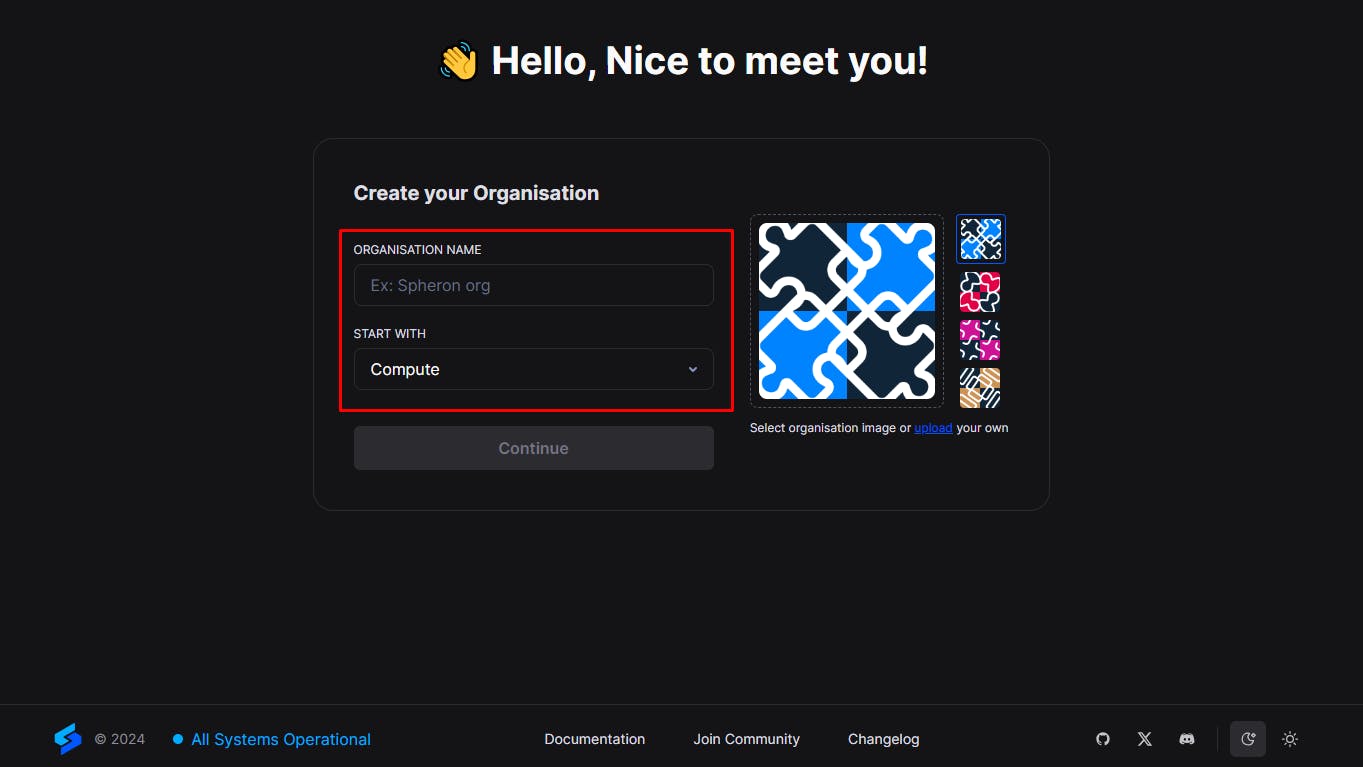
1. Upon logging in, you'll be directed to the Create Organization page, where you can give your organization name and choose Avatar. Ensure the "compute" option is selected from the drop-down menu of the "Start With" option. Click “Continue”.
2. Next, you'll be taken to a new page. Click the "Create New Projects" button. Add 'Project Title' And 'Project Description' and Click Create.

Step 3: Deploying Elixir Validator With Spheron Platform UI
Follow these steps to deploy an Elixir Node:
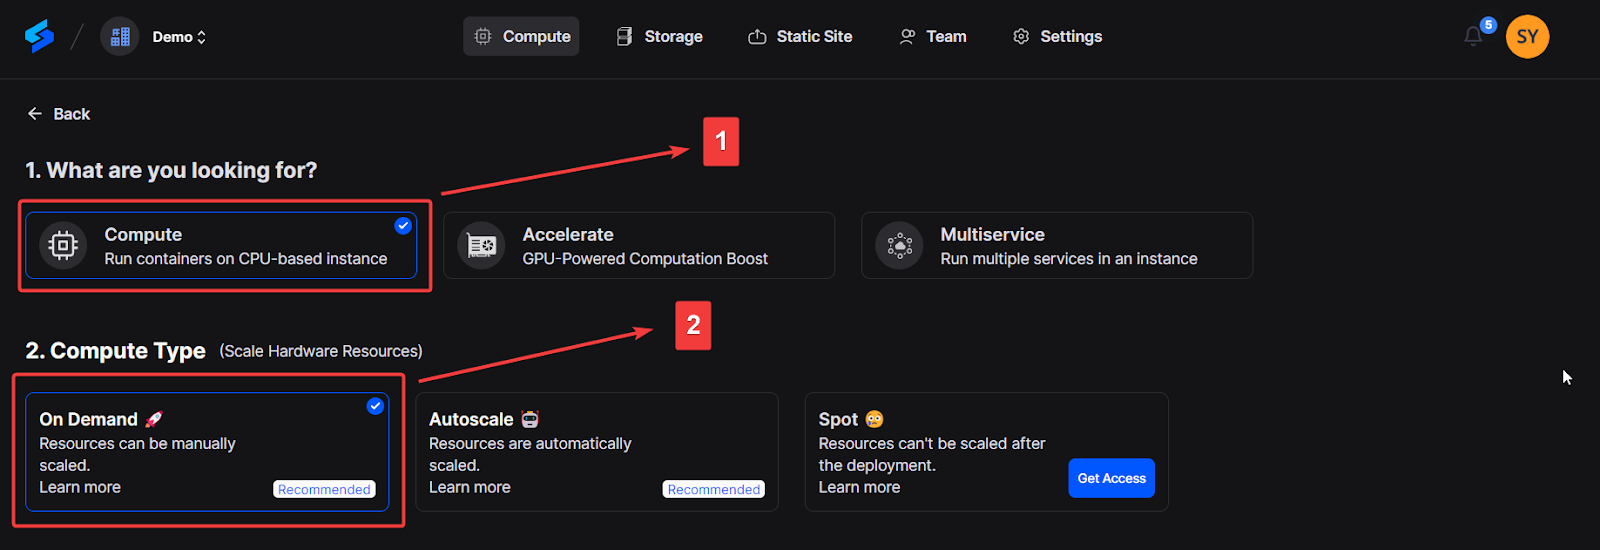
1. Choose "Compute" to use CPU-based instances for running containers.
2. Choose your desired Compute Type option under Compute Type.
NOTE: Please schedule a team call to gain early access to the "Spot" Type.
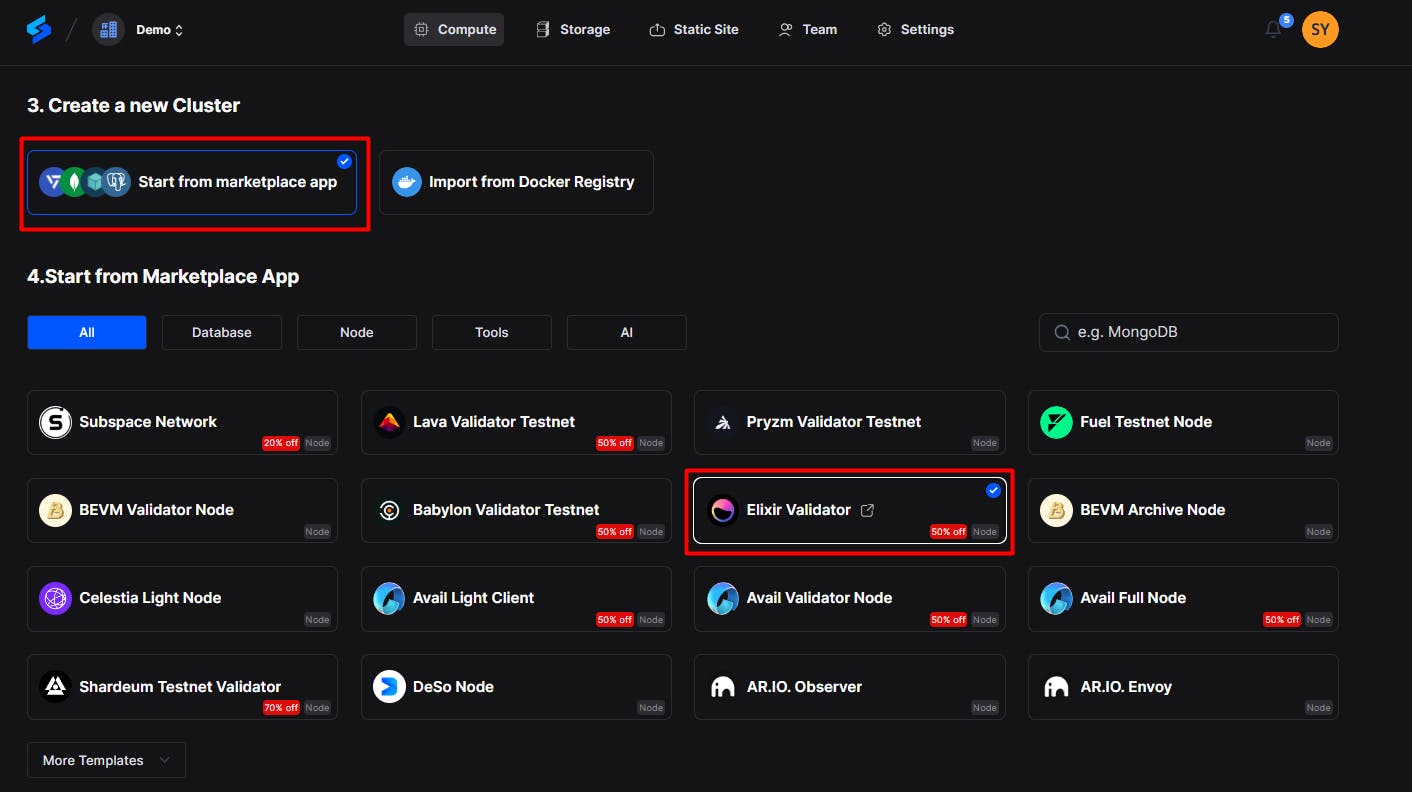
3. Click "Start from Marketplace App" and Select "Elixir Validator" from the marketplace.
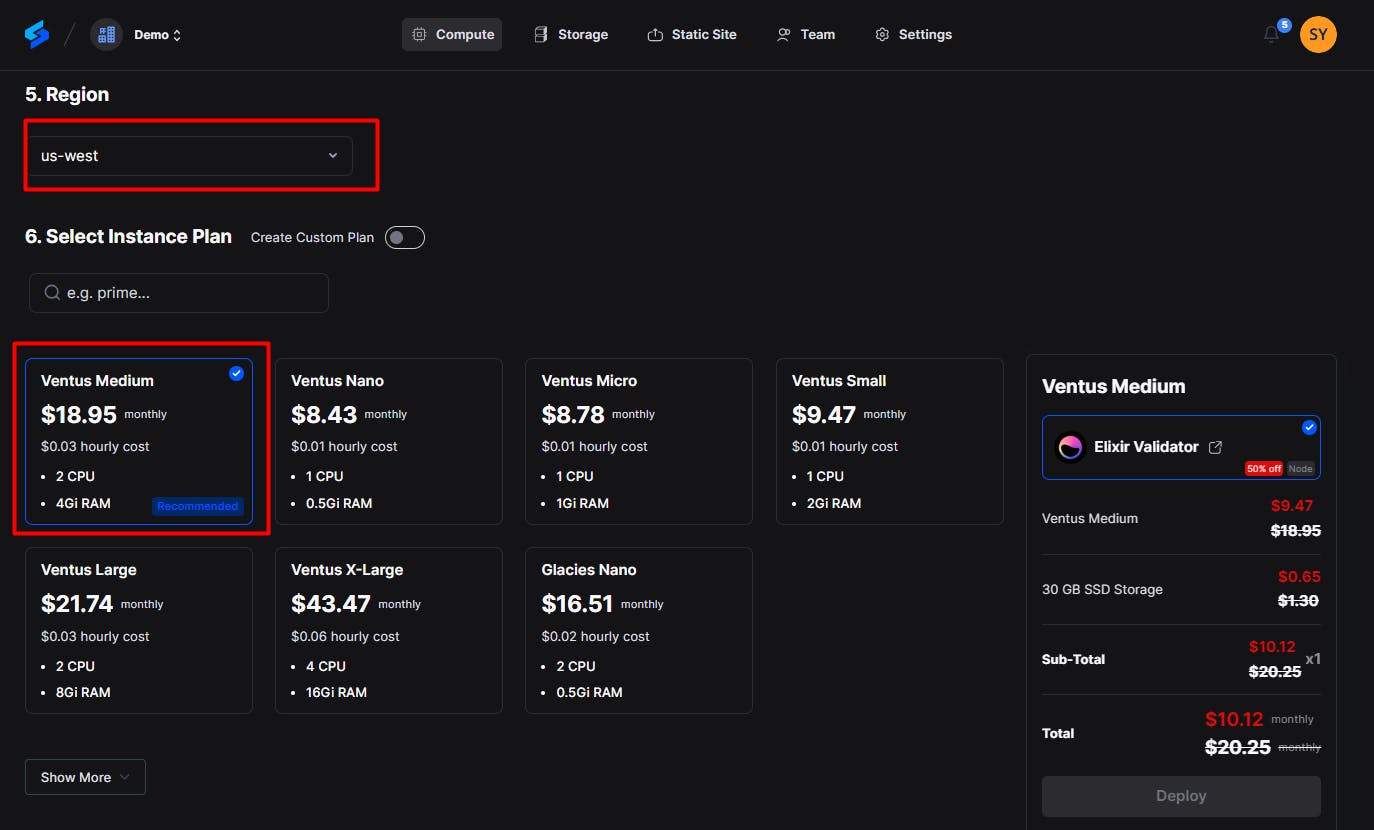
4. Select Region: Select your preferred region for deployment. Choosing a region closer to you. This can improve performance and reduce latency. US-West has a higher chance of deploying everything successfully. You can start from the US-West option.
5. Next, Choose an instance plan that aligns with your requirements. Spheron will recommend a suitable plan according to the Elixir template, but you can customize it from available plans or choose to 'Create Custom Plans.'
According to Elixir Docs, Most hardware is capable of running a validator node. However, it is recommended that you have a system that can be run 24 hours a day, with 4GB of memory and a reliable 100Mbit internet connection. Disk usage is minimal; in most cases, 30GB should be enough.
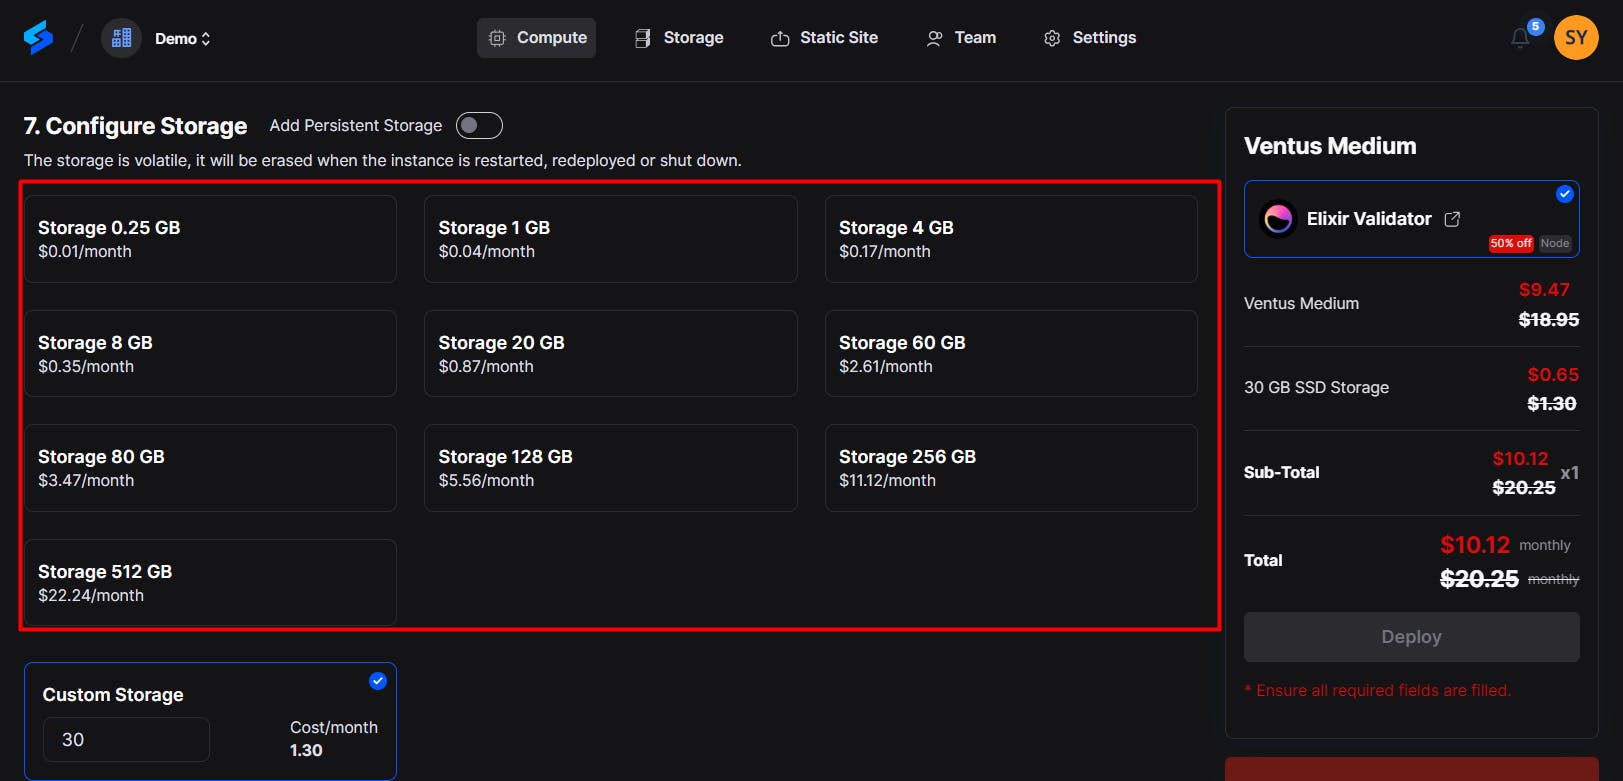
6. Next, Configure storage:
You have to choose storage from the available options or the custom storage option that fits your needs. This storage will be volatile and is erased when the instance is restarted, redeployed, or shut down. Additionally, you get the option to choose Persistent Storage.
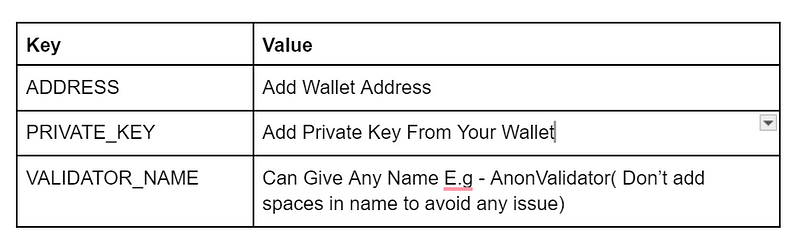
7. Next, go to the configuration. In the ‘Template Configuration’ section, you have to configure the address, private_key, and Validator_name. Add according to the below table.
Step 4: Create a Metamask account (Skip this step if you already have a Metamask wallet)
1. Go to https://metamask.io/ and click on 'Download for Chrome.' You can also download it directly from here.

2. Click 'Add to Chrome' on the next window and add the extension to the browser.

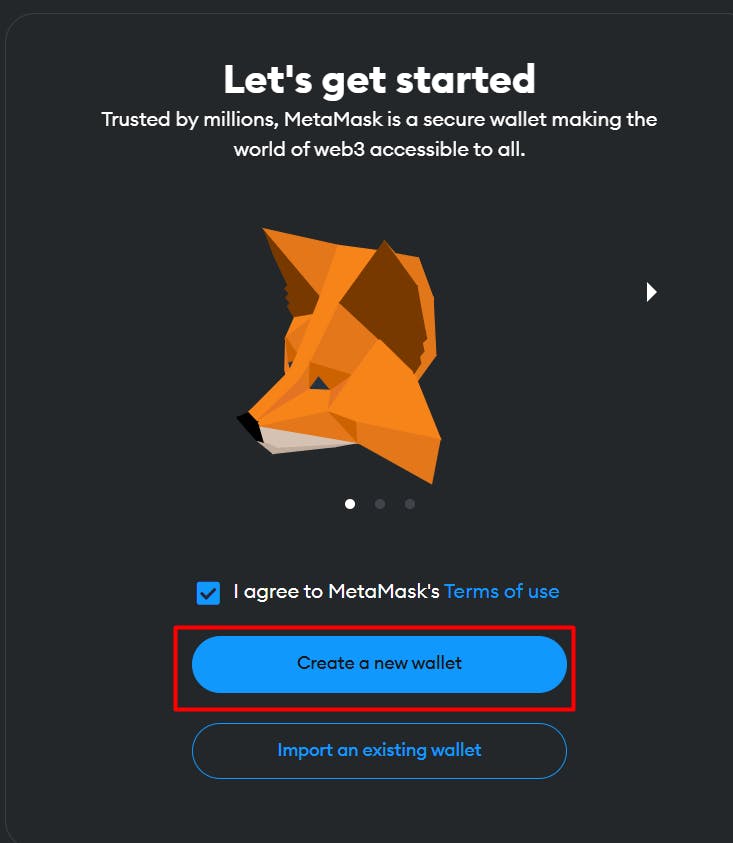
3. After that it will automatically open the extension window of metmask. Click the check box to agree to the terms & conditions and click 'Create a new wallet.' If you already have a wallet, you can import it too.
4. Click I agree. The next step is to create a unique password. Please take note that losing the password can result in the loss of the account due to MetaMask not being able to recover it. Store the password in a safe place, and try to write it down instead of saving the account details to the device.
A video will appear, briefing about the security of passwords and warnings. Proceed to watch this video to better understand how to store passwords. Securing a password in a notebook, a safe, or a secure file is a good way to protect passwords.
Step 5: Get the address and private_key
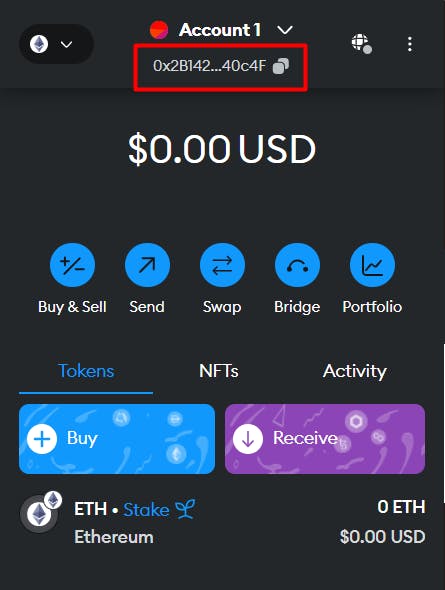
1. Click on the Metmask extension on the browser. Below the account name, you will get the 'address', copy it, and paste it into the Spheron address box.
2. Click on the Kebab Menu on the upper right side, go to the account details, click 'Show Private Keys,' add your password, and click to reveal the private key. Copy it and paste it to the spheron 'PRIVATE_KEY' box.
Step 6: Final Steps
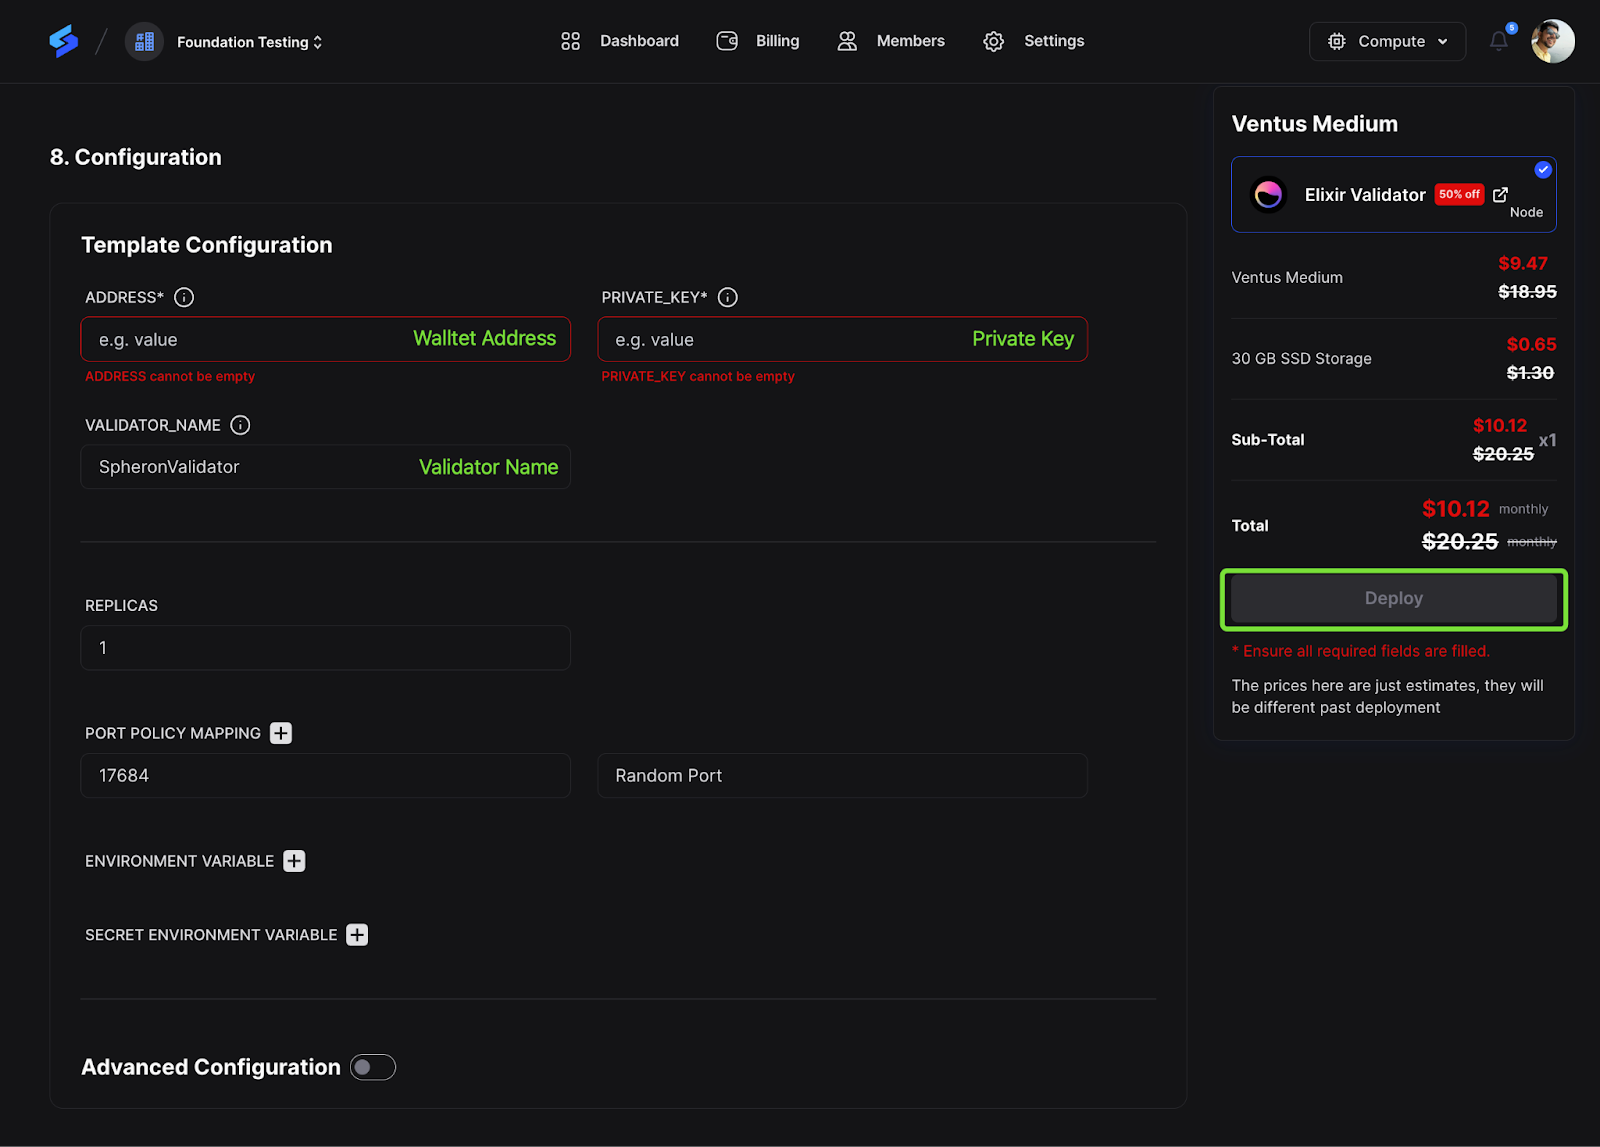
1. After adding the address, private_key, and Validator_name, your configuration will look like the image below.
2. Once you're all set, click "Deploy" to start the deployment process. It's as simple as that!
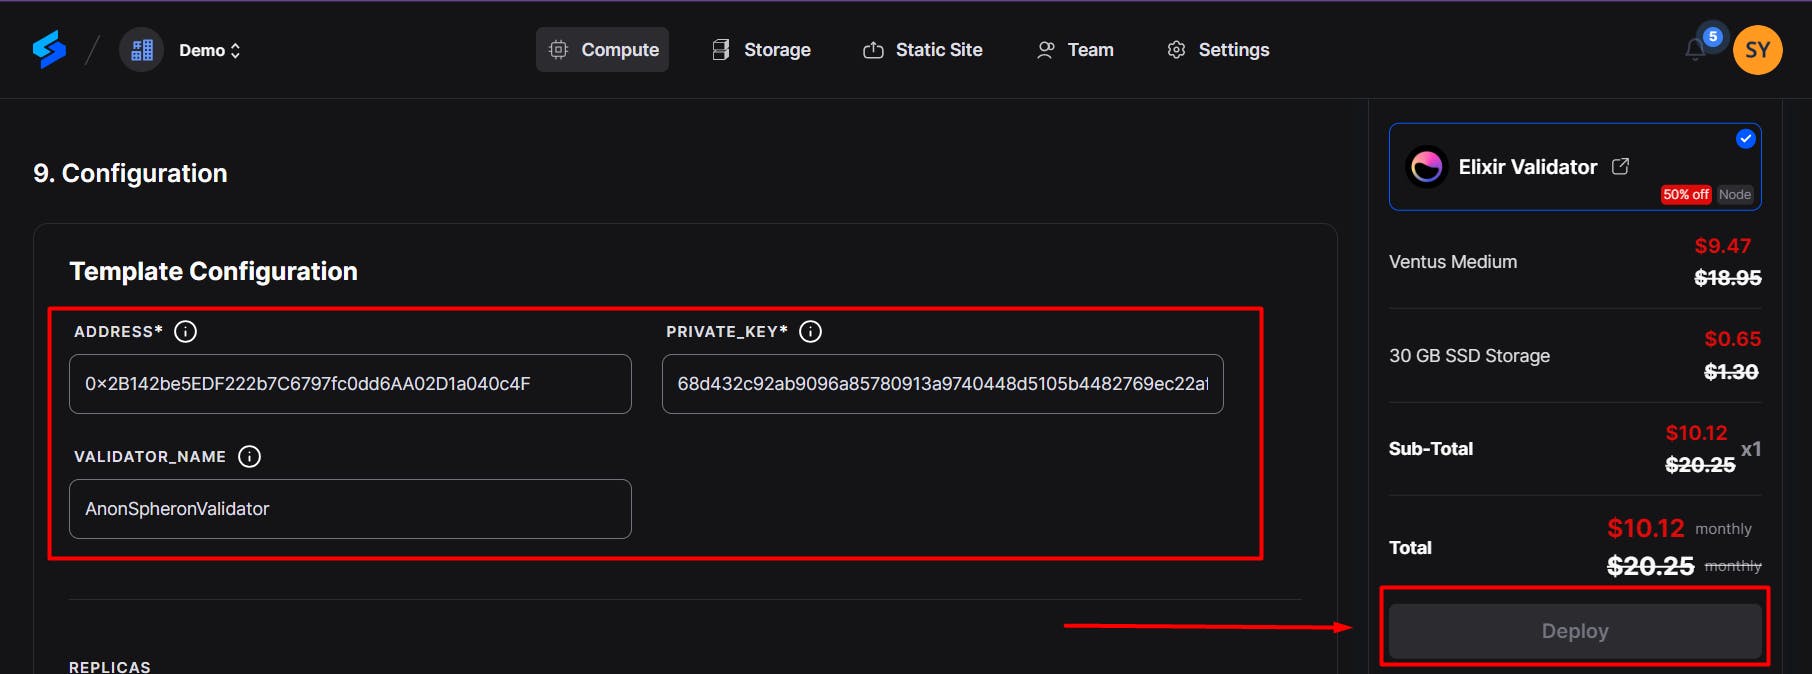
That's it! Your Elixir instance will now be deployed.
3. Wait for your node to be fully set up. After it's provisioned, you'll see an option called ‘Overview’ in the dashboard; click on it to see all the details of the deployed node on Subspace.
Claiming ELXR Tokens and Enrolling Your Validator:
1. Claiming ELXR Tokens:
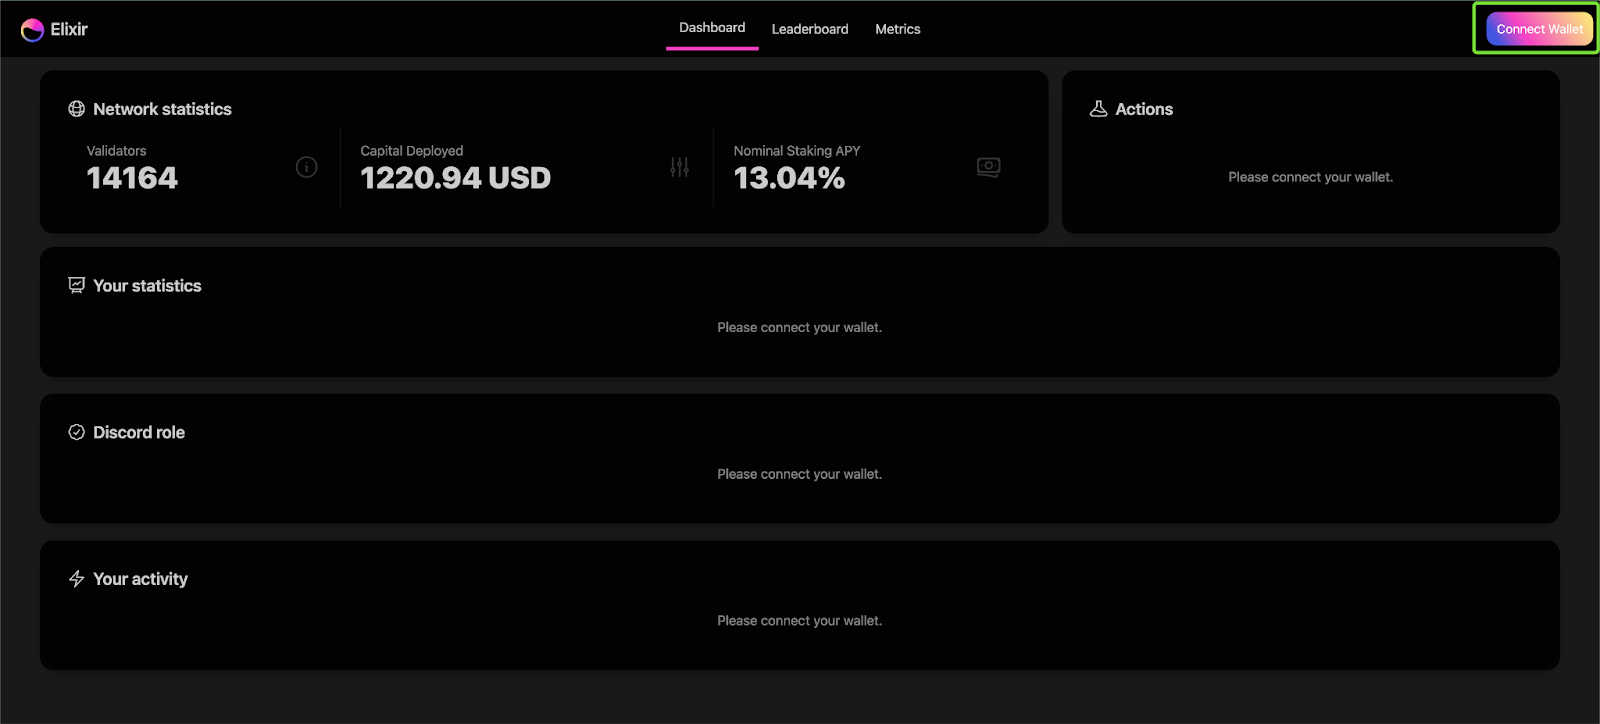
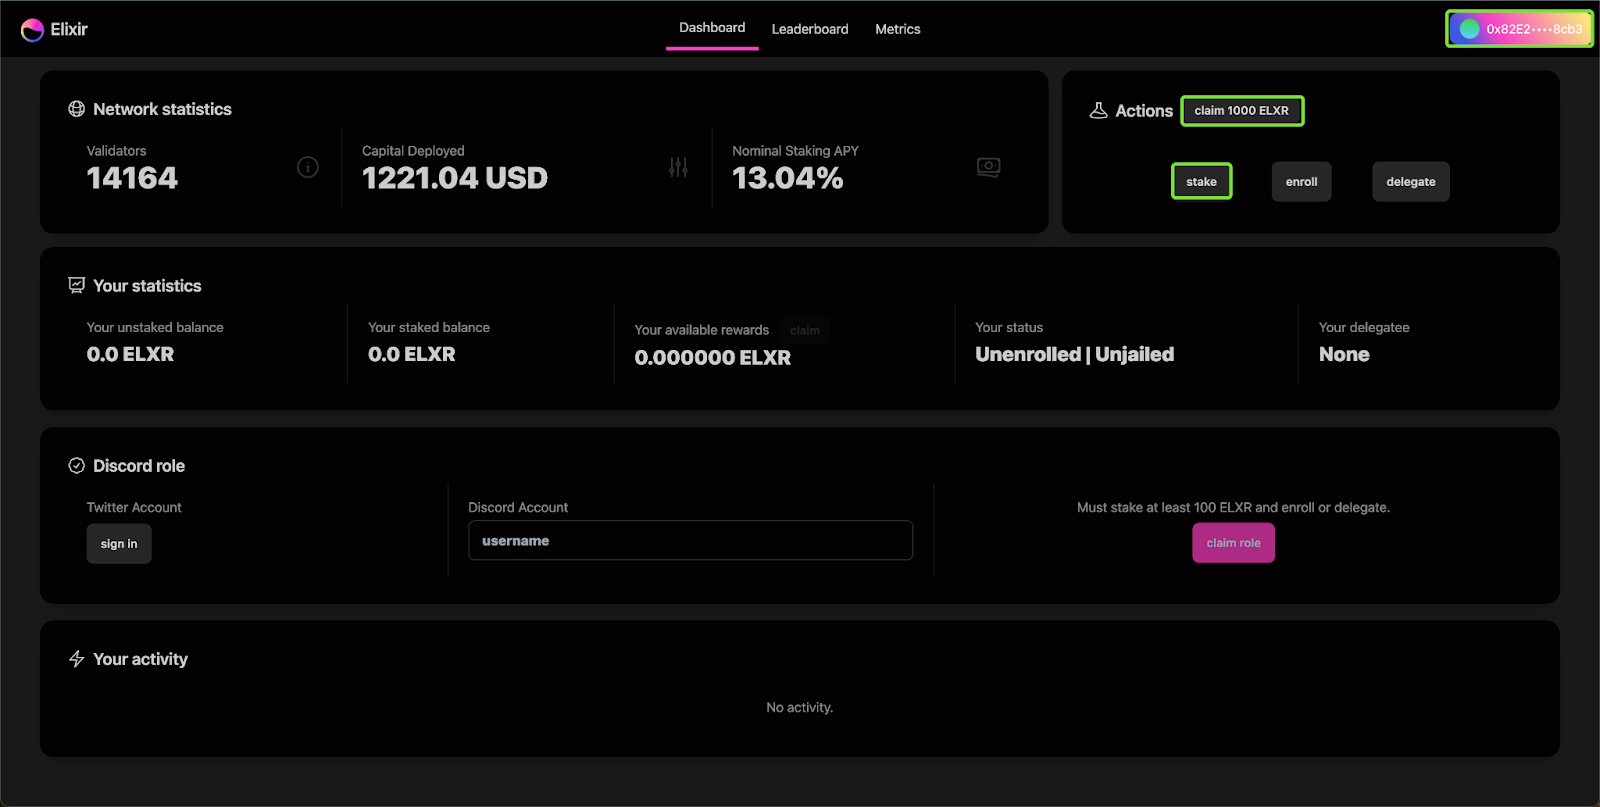
Do a simple Google search and Visit sites offering Goerli testnet tokens, claim ELXR tokens, and return to dashboard.elixir.finance, Connect your wallet, and claim the ELXR tokens.
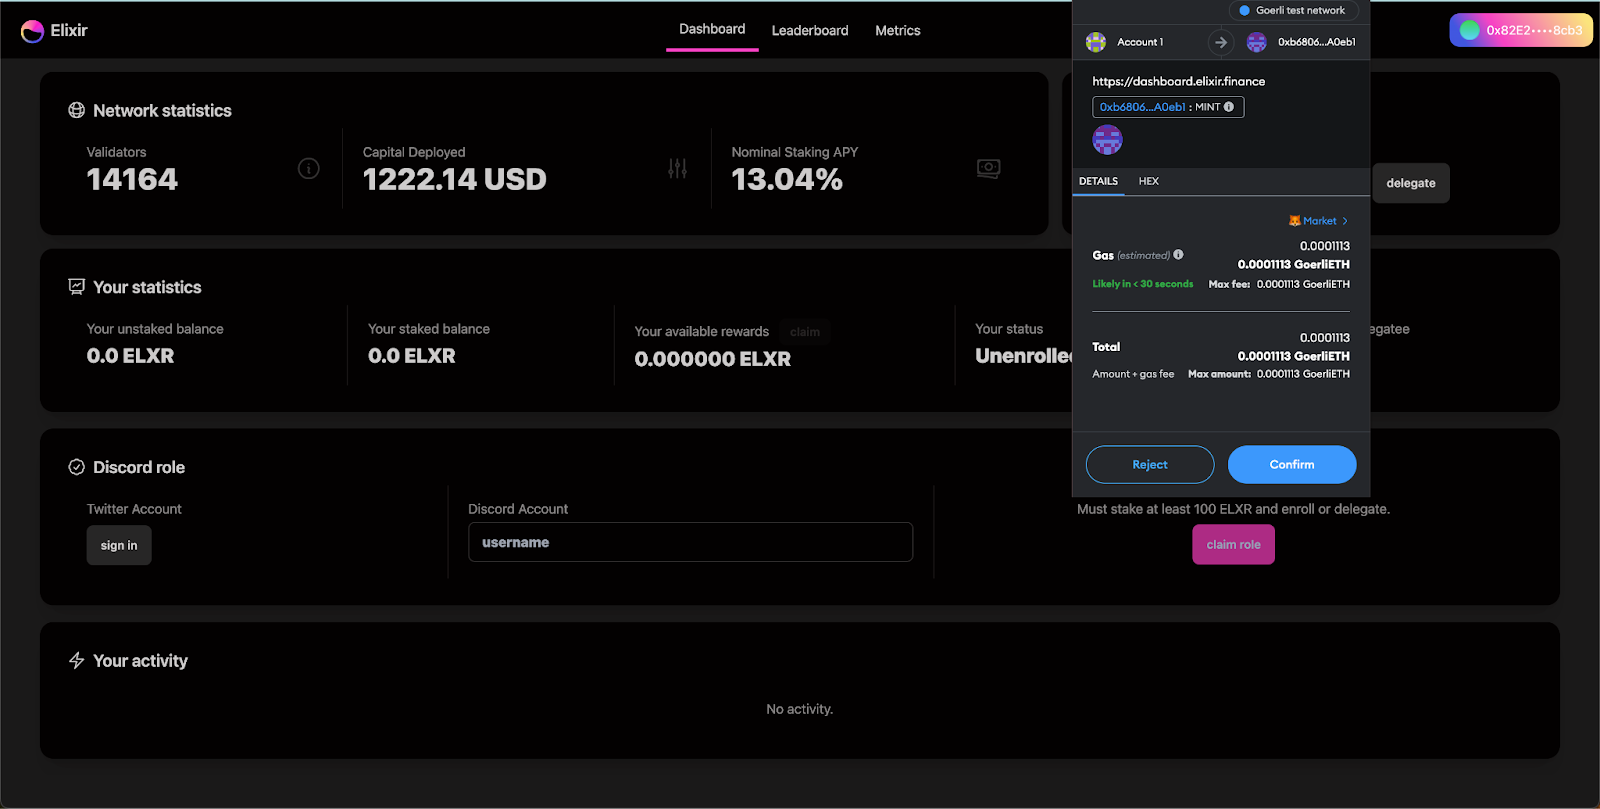
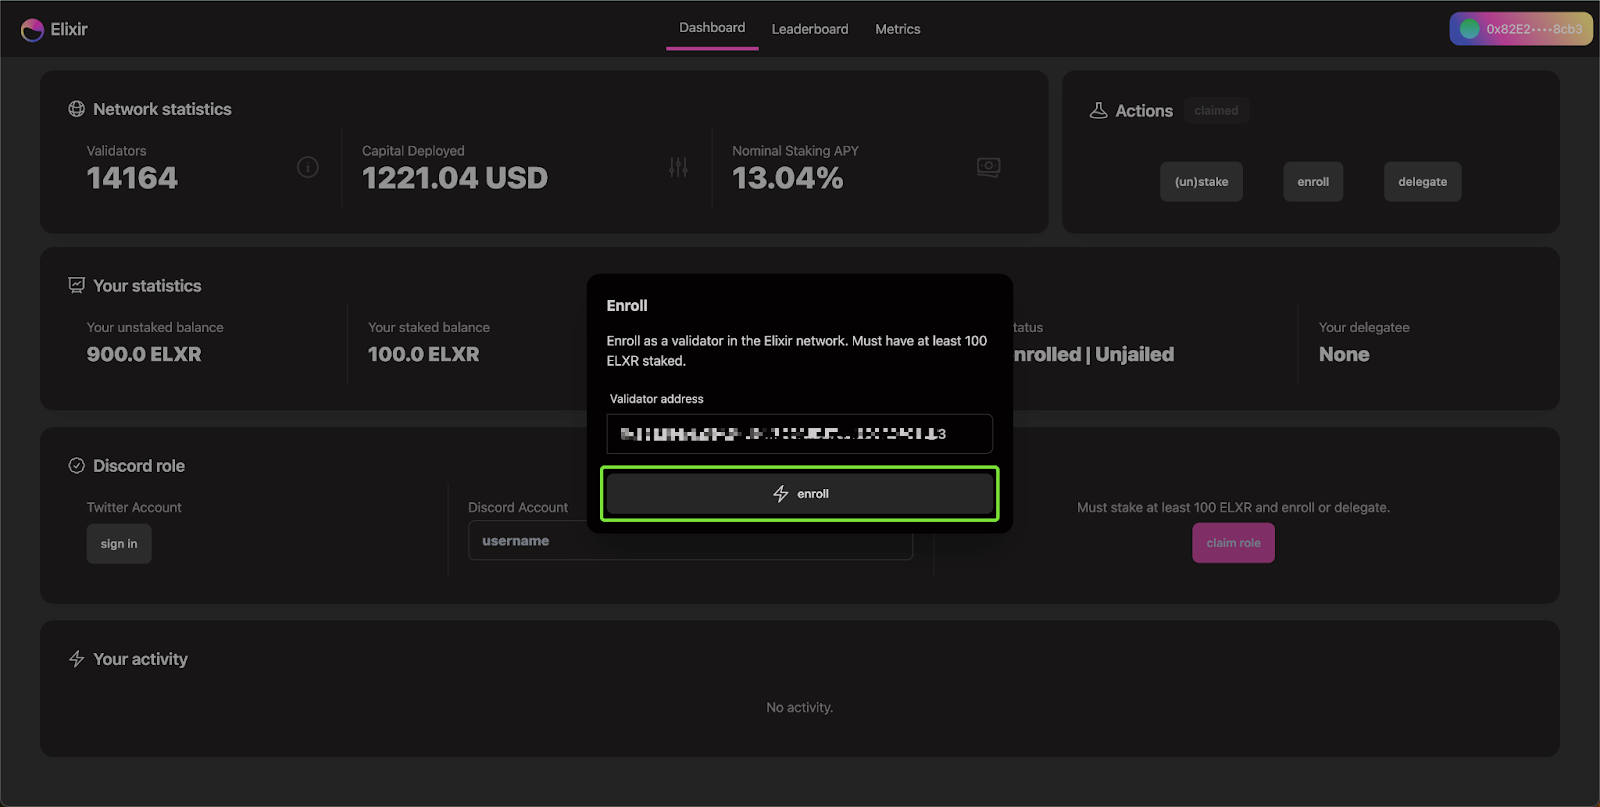
2. Enroll Yourself:
Enroll your wallet address associated with the deployed validator. Confirm the enrollment, and once completed, stake a minimum of 100 ELXR.
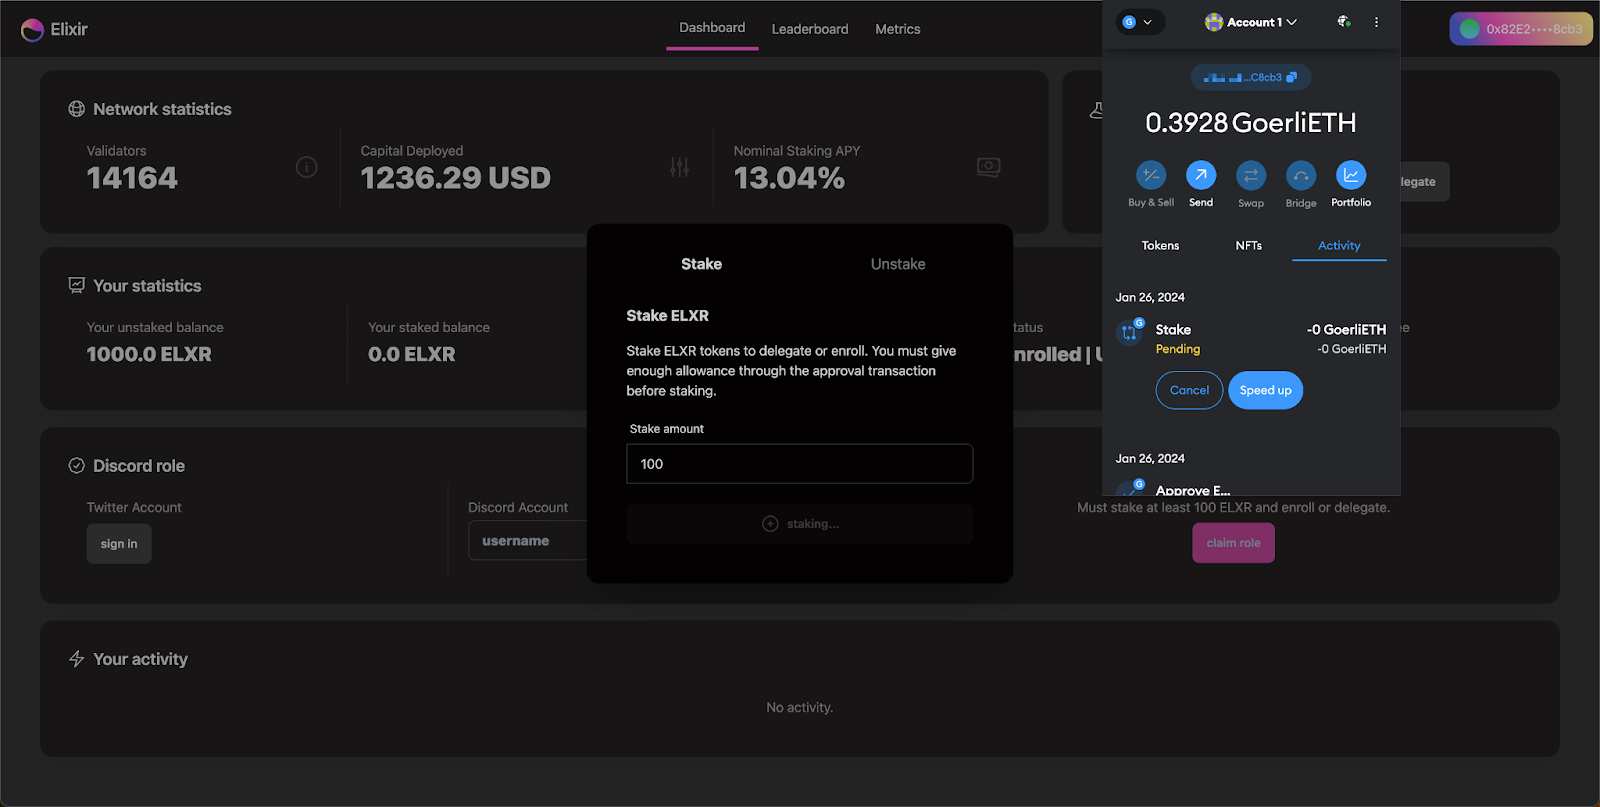
3. Monitor Stake and Node Status:
Through the dashboard, you can monitor your stake and validator status. You can also monitor any logs or events related to your node's deployment.

Troubleshooting and Support:
1. Addressing Issues:
If you encounter any issues, refer to the community.spheron.network or reach out on Discord for assistance. Clear cache if necessary.
2. Final Checks:
Verify that your node's log entries indicate successful deployment. Be patient, as it may take up to 30 minutes for logs to appear. If issues persist, seek support from the community.
Conclusion
Congratulations, your Elixir node is up and running! Participate in the blockchain network, and if you plan to run multiple nodes, consider reaching out to Spheron for possible discounts. Stay engaged with the community and embrace the exciting world of blockchain technology. Happy deploying!