


Reef Chain, with its EVM-compatible chain for DeFi and advanced features, is gaining traction in the blockchain space. If you want to become part of the Reef ecosystem, deploying a Reef Node is the first step. Whether you're a blockchain enthusiast, developer, or organization looking to participate in network validation, this quick deployment method will get you up and running without the hassle of manual configurations.
What is Spheron Network?
Spheron Network is a Web3 infrastructure platform that provides tools and services to decentralize cloud storage and computing. It allows audited data centers to join the Spheron marketplace. Spheron oversees the decentralized and governed nature of the infrastructure, ensuring permissionless access and heightened security for all users. Spheron Compute offers a feature-rich alternative to traditional cloud services at only one-third of the cost.
Spheron offers a Compute Marketplace, which allows users to set up valuable tools quickly and easily, whether they want to deploy databases, nodes, tools, or AI. With Spheron, you don't have to worry about the technical stuff, and you can focus on deploying your Node with ease. Spheron Network has also partnered with organizations like Shardeum, Avail, Elixir, Filecoin, Arbitrum, etc, to redefine access to it and promote a more decentralized, inclusive, and community-centric ecosystem.
Spheron provides features such as Private images, Auto-scale instances, Scale on demand, Real-time instance metrics, Faster GPUs, Free Bandwidths, Terraform Providers and SDKs, Instance health checks, activity, shell access, and more. Spheron provides add-on storage solutions for long-term data storage and edge bandwidth acceleration through its global CDN. With Spheron,you can easily set up your nodes in just a few minutes and enjoy low maintenance and operations costs and a great developer experience.
How do you deploy a Reef Node using Spheron Compute?
You can follow these steps to deploy a Reef Node on Spheron Compute.
Step 1: Create a Free Spheron Network Account
Visit Spheron Network: https://spheron.network/
On the Spheron homepage, locate and click the "Free Trial" button.

You'll be directed to a signup page. Choose your preferred authentication method: Web2 (GitHub account, GitLab account, or Bitbucket account) or Web3 (Ethereum).
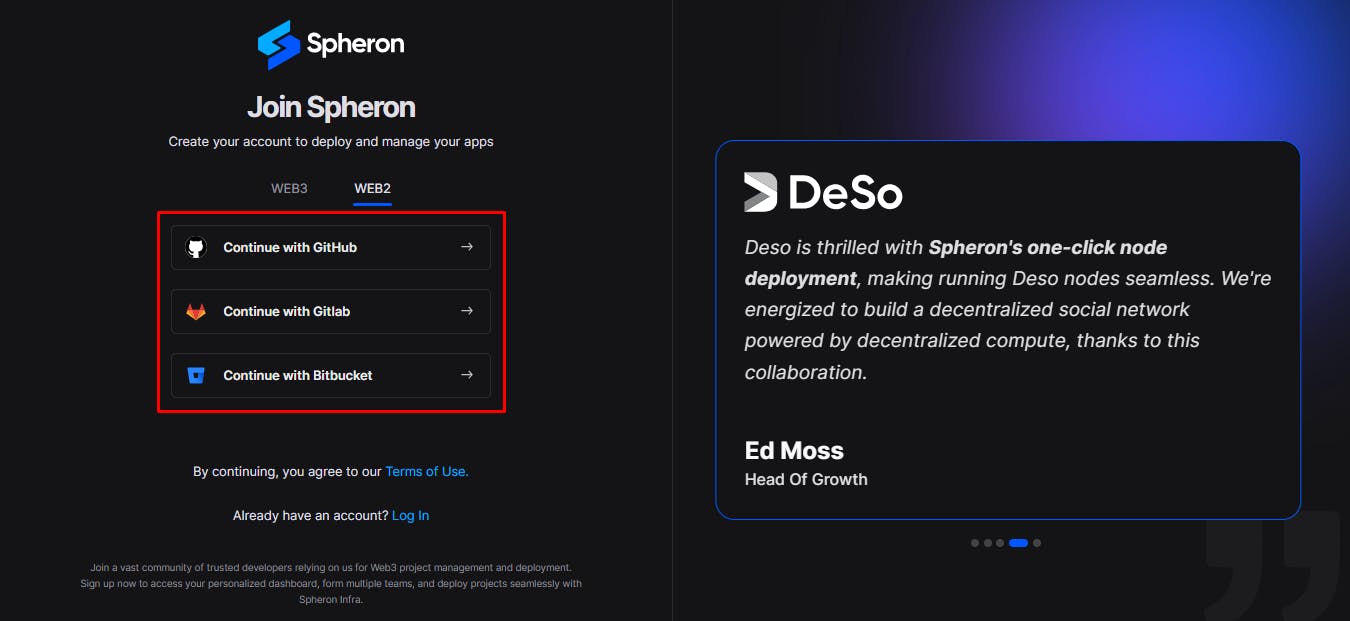
Follow the provided prompts to authenticate your chosen account securely. This step ensures safe access to the Spheron Network platform. After successful authentication, you'll be guided to a confirmation page confirming the completion of your account setup.
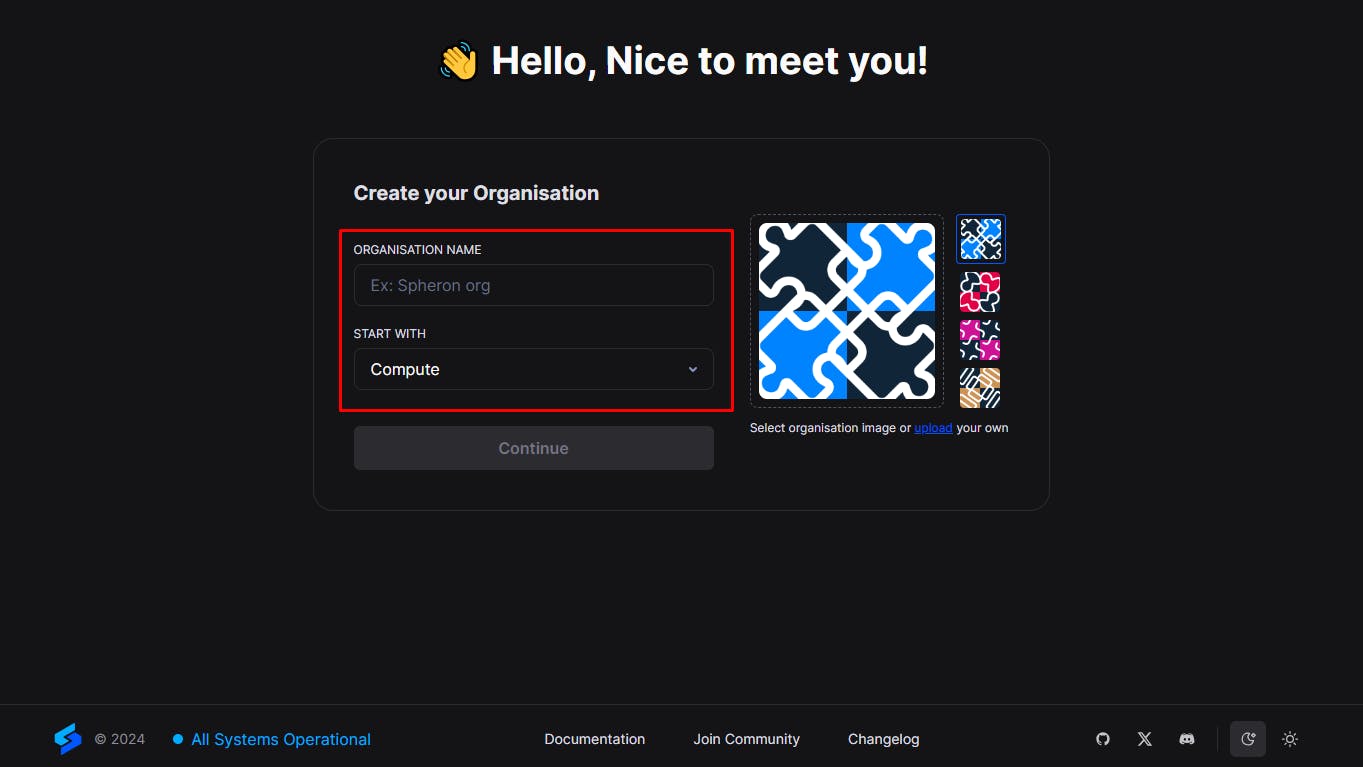
Step 2: Creating an Organization
1. Upon logging in, you'll be directed to the Create Organization page, where you can give your organization name and choose Avatar. Ensure the "compute" option is selected from the drop-down menu of the "Start With" option. Click “Continue”.
2. Next, you'll be taken to a new page. Click the "Create New Projects" button. Add 'Project Title' And 'Project Description' and Click Create.

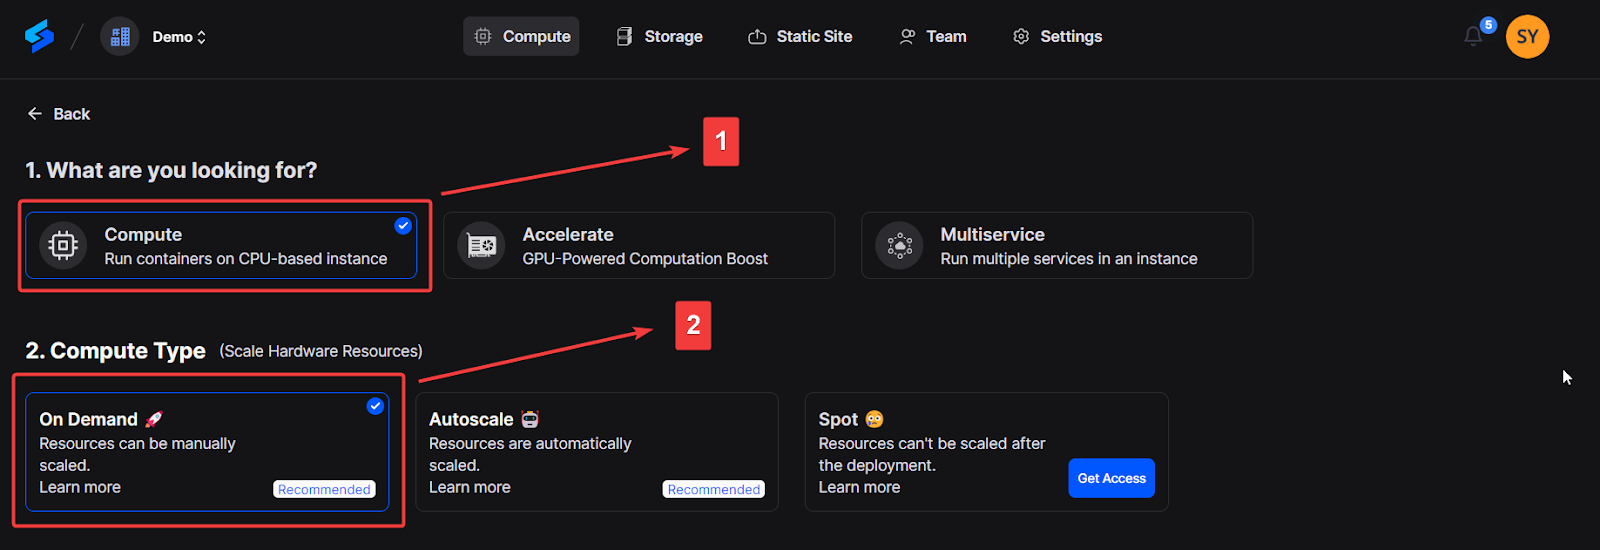
Step 3: Deploying a Reef Node With Spheron Platform UI
Follow these steps to deploy a Reef Node:
1. Choose "Compute" to use CPU-based instances for running containers.
2. Choose your desired Compute Type option under Compute Type.
NOTE: Please schedule a team call to gain early access to the "Spot" Type.
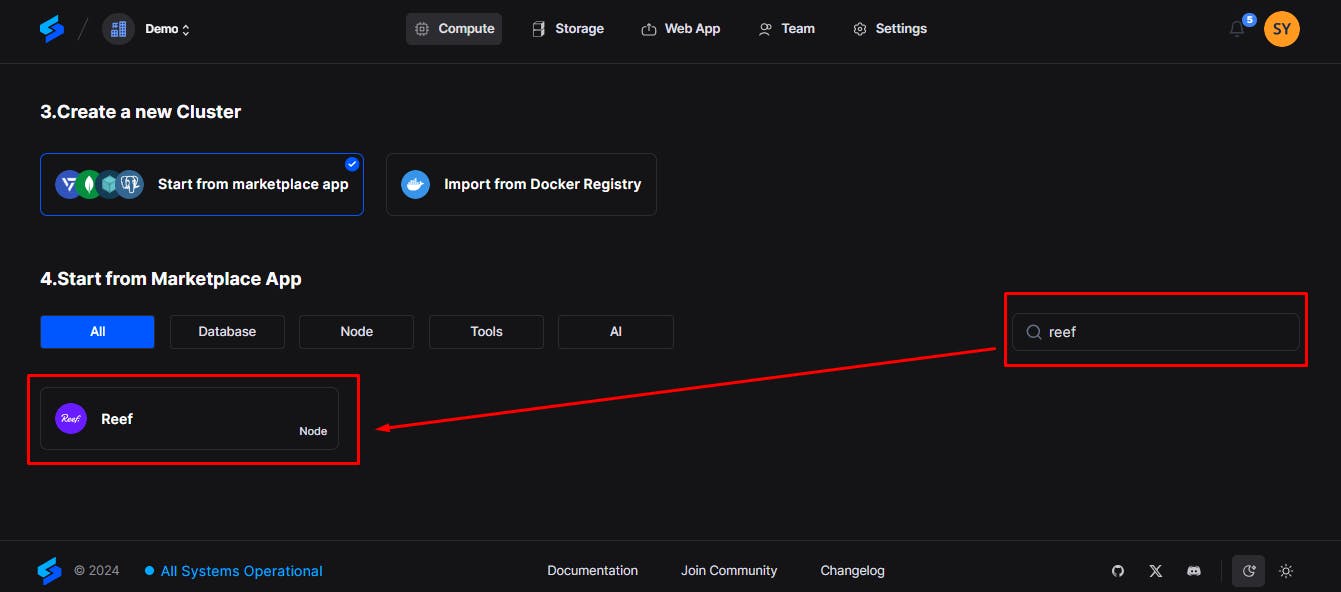
3. Click "Start from Marketplace App" and Select "Reef" from the marketplace. You can type reef in the search box to quickly find the option. Spheron currently supports 35+ templates.
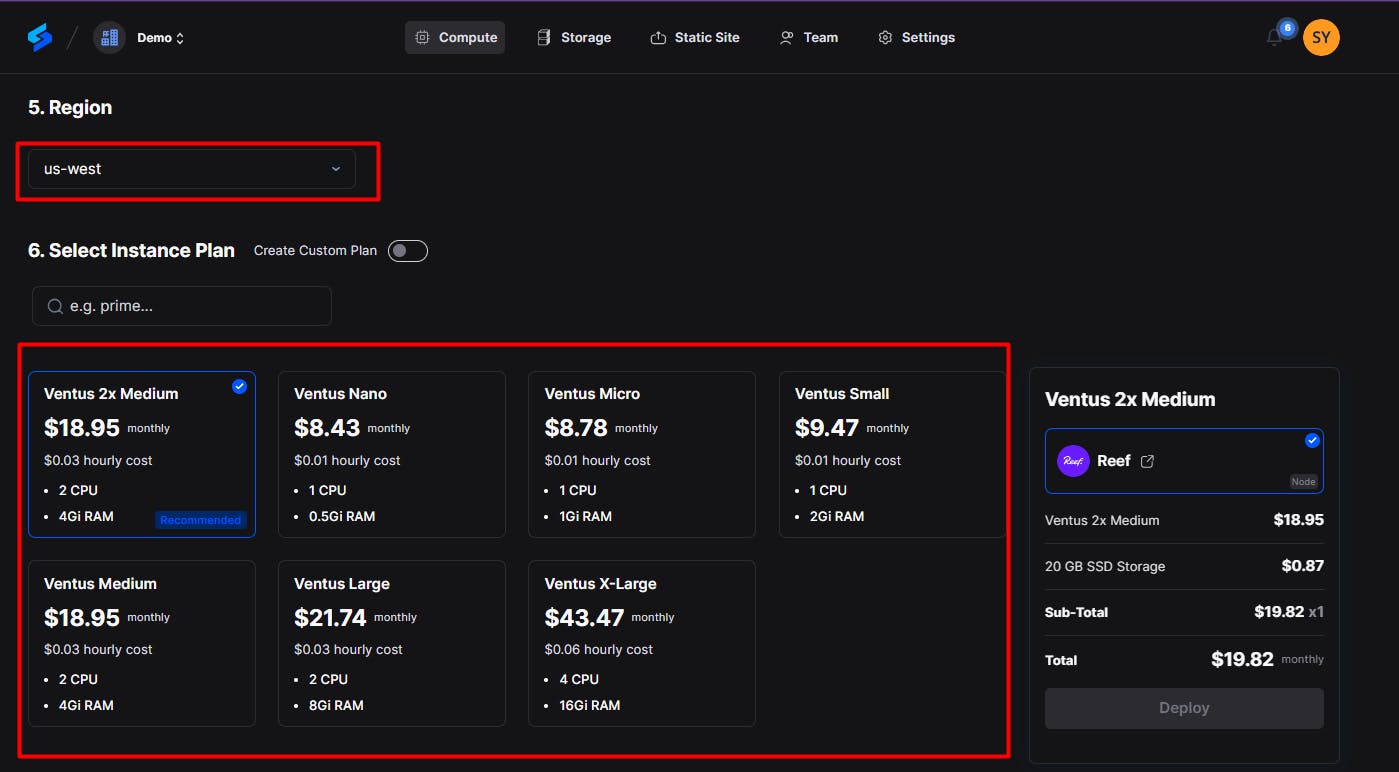
4. Select Region: For the best experience, use the US-WEST region to deploy your node!
5. Next, Choose an instance plan that aligns with your requirements. Spheron will recommend a suitable plan according to the Reef template, but you can customize it if needed from available plans or choose to 'Create Custom Plans.'
6. Next, Configure storage:
You have to choose storage from the available options or the custom storage option that fits your needs. This storage will be volatile and is erased when the instance is restarted, redeployed, or shut down.
Additionally, you get the option to choose Persistent Storage. Persistent storage will not be erased unless the instance is closed. If choosing persistent storage, specify the type of storage (NVMe) and Add a mount point.

7. Next, you will get the configuration option, but Spheron has made it easy and auto-filled the configuration options for you. You can add advanced configuration if required. Click here to know more.
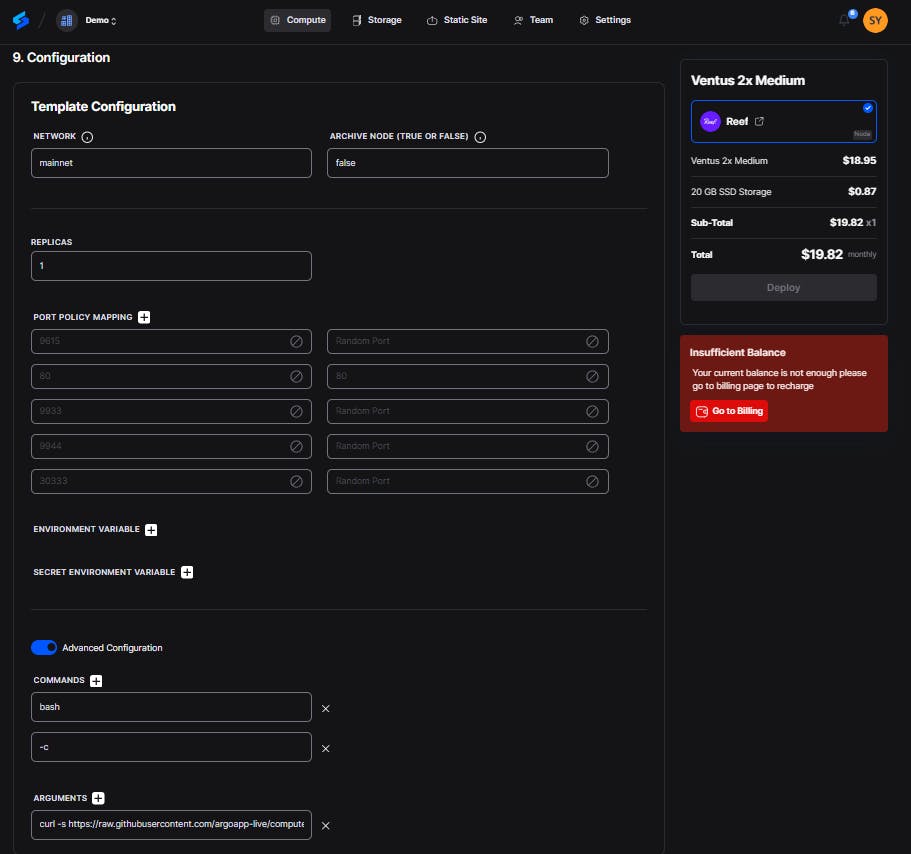
8. Once you're all set, click "Deploy" to start the deployment process. It's as simple as that!
That's it! Your Reef Node instance will now be deployed.
Wait for your node to be fully set up. After it's provisioned, you'll see an option called ‘Overview’ in the dashboard; click on it to see all the details of the deployed node on Reef.
Benefits of Deploying Reef Node with Spheron Compute
Deploying your Reef Node with Spheron Compute offers many benefits, including:
Simplicity and Speed: Spheron Compute's user-friendly interface and streamlined deployment process make it easy for beginners and experienced users to set up a Reef Node quickly. You can save valuable time that would otherwise be spent on server provisioning and configuration.
Cost-Efficiency: Spheron Compute provides cost-effective solutions, ensuring you get the most out of your resources. You can choose the plan that aligns with your budget and scale as needed without breaking the bank.
Reliability and Performance: Spheron's infrastructure is designed for stability and high performance. Your Reef Node will run smoothly, ensuring you can access your data when needed without interruptions.
Flexibility: With various instance plans and the ability to create custom plans, you can tailor your deployment to meet your specific requirements. This flexibility allows you to optimize your resources for the best performance.
Persistent Storage: Spheron Compute offers the option to add persistent storage, ensuring your data is safe and accessible even if the instance is updated or replaced.
Scalability: Whether you're starting small or planning for growth, Spheron Compute allows you to scale your Reef Node deployment with ease. You can handle increasing data volumes and growing user demands effortlessly.
Support and documentation: Spheron provides comprehensive documentation and support, helping you navigate any challenges you may face during deployment and development.
Conclusion
Whether you're a blockchain enthusiast, developer, or organization seeking to harness Reef's power, Spheron Network offers an efficient and accessible solution. Don't miss out on the blockchain revolution. Start your Reef Node deployment journey today and be part of the ever-expanding world of blockchain innovation.
Explore the Spheron Guide to start your journey toward hassle-free deployment and development.
Resources
Spheron Reef Node Guide:https://docs.spheron.network/marketplace-guide/reef/
Reef Node Documentation:https://docs.reef.io/docs/developers/nodes/